
Saturday, August 29, 2009
Green Tea Ice Cream

In my previous post I mentioned that I was on ice cream making spree. I have discovered the excellent quality of home made ice cream and how different it is from the general store-bought variety. One of the trials was to make David Lebovitz's Green Tea Ice Cream. I had purchased some good quality matcha from the famous Ippodo in Kyoto last year and decided to make use of it. Good quality matcha contributes to the lovely green colour of this ice cream. Using an inferior quality green tea power results in an ice cream which will not look as attractive.
For those green tea afficados, here's the recipe. You won't regret it.
Green Tea Ice Cream (Makes about 1L)
- 1 Cup (250ml) Whole Milk
- 3/4 Cup (150g) Sugar
- Pinch of Salt
- 2 Cups (500ml) Heavy Cream
- 4 teaspoons Matcha (green tea powder)
- 6 Large Egg Yolks
Method
- Warm milk, sugar and salt in a saucepan.
- Pour cream into a large bowl & whisk together with macha powder. set a strainer on top.
- In another bowl, whisk together egg yolks and slowly pour in the warmed milk mixture while whisking constantly, and put the mixture back to the saucepan.
- Stir the mixture constantly over medium heat, scraping the bottom as you stir, until mixture thickens and coat the back of a spatula, or about 85degC.
- Pour custard through the strainer into the cream, then whisk vigorously until custard is frothy to dissolve the macha powder. Stir until cool over an ice bath.
- Chill the mixture thoroughly then churn in an ice cream maker according to manufacturer's instructions then freeze until firm.
Its really very yummy. You have to try it!
Thursday, August 6, 2009
Ice Cream
Lately I have been on an ice cream making spree. My Cusinart ice cream maker is finally getting its much needed exercise. I have made Green Tea, Chocolate, Vanilla and Black Sesame ice cream so far. My education in ice cream and its consituents is finally moving along.
In my opinion, there are basically two ways of making ice cream. There is the Simple Way and the Not-So-Simple way. The Simple Way is by blitzing everything in a blender, and setting the whole mixture. The Not-So-Simple Way involves egg yolks and making a custard. Taste wise, the Not-So-Simple way produces a product which is far superior than the Simple Way. Its creamier, smoother and richer (and of course more calories). But if you eat in moderation, I highly recommend the Not-So-Simple way to make ice cream because one should not waste their (and their friends and family's) calories on the not-the-best food.
I'll take some photos of the ice creams I have made and post them up with recipes. If you have a ice cream making sitting dustily in the storage or at the far back of the cupboard. It may be time to take them out, wipe off the dust lovingly and set it to work. If you follow those recipes that I post up and make your own ice cream, you'll enjoy an ice cream tastewise far better than those you'll buy in the supermarkets. And these freshly made bundles of ice cream will be free of preservatives and full of love. Watch out for the coming post!
Saturday, July 25, 2009
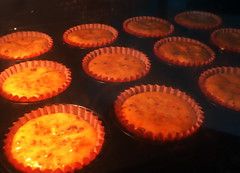
French Apple Tarte

Hullo folks, for those that have been following my food blog, i know i haven't been regular in posting, and its been some time since my last blog entry. Life's been busy. I went on a really lovely two week vacation to Europe and had my first encounter with the French Apple Tarte in a cafe in Paris. I was entralled by the taste. It was sweet, tangy and rich. The emsemble had thinly sliced apples sitting on a crisp buttery thin crust. Upon return, I was determined to re-create it at home. I can't possibly fly to paris just to satisfy a craving, can I. Mastering the art of french apple tarte is certainly the cheaper option.
I obtained a recipe from Food Network. Ina Garten's recipe looked promising and I decided to use the apple fomula from that. For the base, I used the recipe from David Lebovitz. That is my go-to recipe for pie crust, sweet or savory.
Without further ado, here's the recipe.
Ingredients for the apples topping:
- 4 Granny Smith (green) apples
- 1/2 cup castor sugar
- 4 tablespoons cold unsalted butter, diced into small cubes
- 1/2 cup apricot jam/gel
- 1 tablespoons rum
- 1 tablespoon water
Method
- Peel the apples and remove the cores from them.
- Slice the apples crosswise in thin slices.
- Place overlapping slices of apples diagonally down the middle of the tart and continue making diagonal rows on both sides of the first row until the pastry is covered with apple slices.
- Sprinkle with the full 1/2 cup of sugar and dot with the butter.
- Bake for 45 minutes to 1 hour, until the pastry is browned and the edges of the apples start to brown.
- Rotate the pan once during cooking.
Loosen the tart with a metal spatula so it doesn't stick to the paper.
Allow to cool and serve warm or at room temperature.
Enjoy!
Thursday, April 23, 2009

Sunday, April 5, 2009
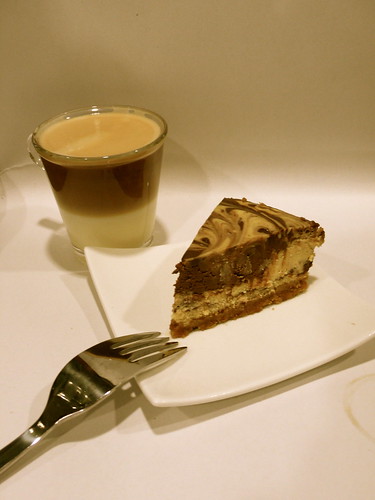
Chocolate Caramel Cheesecake
Cheesecakes are finicky, they are relatively easy to make...with some precautions. I've listed those below what those are so you will not make the mistakes like i did....twice.
Dos and Don't of Cheesecake Baking
1. Make sure that ingredients are room temperature before baking. Bring them out of the fridge at least 10mins before baking.
2. Bake the cheesecake in a springform tin, it makes un-moulding the cheesecake easy. Remember to lightly oil the sides with to prevent the cheesecake from sticking to the side and causing the cheesecake to crack during cooling.
3. Ensure that your oven is pre-heated to the correct temperature. Place the cheesecake in the middle of the oven in a water bath filled with boiling water.
4. When mixing the ingredients, DO NOT OVERBEAT! This was a mistake that I first made when I started baking cheesecakes. Overbeating will cause too much air incorporated into the cheesecake and will cause it to crack. This is not a butter cake or sponge cake where you would beat the crap out of the butter and sugar to get as much air into the batter so the cake will be light and fluffy. Cheesecakes work in the opposite way. Beat the cheese with a paddle beater just to soften it up and add in the eggs, one at a time, beating it gently in at LOW speed. Eggs can also be folded in with a spatula/wooden spoon.
5. Do not open the oven door when baking. This creates a flow of cool air into the oven and cause the top of the cheesecake to crack a wide smile. Not something that looks pretty unless its an oreo cheesecake and you intend to over the top with crushed oreo bits. Then I guess it really doesn't matter.
6. Once the cheese cake has completed the baking time, it normally takes about 60mins to bake, remove cheesecake from water bath gently. Avoid too much shaking. Run a metal spatula or small knife round the side to prevent sticking to the cake tin wall. Do not un-lock the springform pan right away. Leave cheesecake to cool in the room till before placing it in the fridge.
7. Some recipes indicate cheesecake to chill for at least 4hours before serving. My suggestion is to chill overnight. 4 hours is waaaay to short for the flavours to fully blend and meld together. For best results....chill overnight.... i cannot stress this enough. Trust me. This is also another mistake which impatient me has committed.
8. Finally, eating the cheesecake. To slice the cheesecake pretty-ly, use a metal knife sipped in hot water, and wiped with a paper towel between cuts. This will give you smooth cuts with clean slices of cake.
All set to try to make your cheesecake yet? Here's the recipe...
Chocolate Caramel Cheesecake (Adapted from Stefanie)
Ingredients for Base
170g Graham Crackers (or Digestive Biscuits / Marie Biscuits)
30g Light Brown Sugar
70g Melted Butter (either salted or unsalted)
Ingredients for Caramel Layer (Optional)
120ml Dulce de Leche*
Pecan nuts, chopped
Ingredients for Cheesecake Layer
170g Chocolate Ganache (Made from 200g of 55% Dark Chocolate, melted and 1 tin of Nestle Cream, 170g)
500g Cream Cheese, softened
150ml Sour Cream
150g Brown Sugar
1 Tsp Vanilla Extract
2 Eggs
1/4 Cup Plain Flour
Method
1. Place biscuits in a clean, food-safe, disposable plastic bag and pound till becomes crumbs. Combine crumbs with sugar and melted butter. Press unto bottom of a 9" springform pan. Place in freezer for 10mins to firm up the base.
2. Remove pan from freezer and pour caramel or Dulce de Leche mixture, sprinkle nuts and freeze for 30mins.
3. Preheat oven to 160degC.
4. Using a stand mixer, use the paddle blade and beat cream cheese, sugar, sour cream, vanilla until smooth. Beat at medium speed, do not oven beat. We don't want to incorporate too much air. Beat in the eggs one at a time (you can also use a spatula to fold the beaten eggs in one at a time). Sift in the Plain Flour and beat gently. Remove 1/3 of the batter and mix with chocolate ganache till smooth. Take the springform pan out of the freezer and pour some of the non-chocolate batter on the base. Marble 1/2 the chocolate cheesecake batter into the mixture. Pour remaining non-chocolate batter into the pan, add the rest of the chocolate cheesecake batter and marble the mixture using a knife.
5. Wrap the pan in double layer of heavy duty aluminium foil and place it into a larger pan (already in oven), and pour boiling water into the larger pan, surrounding the springform pan with cheesecake in it. Bake for 55-60mins. The center of the cheesecake may not look like its cooked, and may appear wobbly. This is normal. Do not wait for the center to look firm, you cheesecake would be waaaay overcooked by then.
6. Very important step, remove cheesecake from water bath, place on counter, cool before placing in fridge. Refrigerate overnight. This is a must for the flavour and cheese to property meld and blend. It makes a very big difference. Trust me.
Okay....now you have the recipe, go try it and let me know how yours turns out.
*Dulce de Leche Recipe - Adapted from David Lebovitz
Preheat the oven to 22odegC
Pour 1 Can of Sweetened Condensed Milk into a Pyrex baking dish. Stir in a dash of sea salt.
Set the baking dish into a larger one, like a bain marie. The water should reach halfway up the side of the smaller one.
Cover the smaller dish snugly with aluminium foil and bake for 60-90min. Check frequently during baking and add more water into the larger, outer dish as necessary.
Once Dulce de Leche is browned and caramelized, remove from oven and cool. Once cool, whisk till smooth using a hand whisk.
Store in the refrigerator until ready to use. If its too stiff, warm in a water bath.
Saturday, March 21, 2009
Strawberry Banana Muffins

There are cupcakes and there are muffins. They are totally different creatures. Not exchangeable or replaceable. But there have been a lot of cupcakes masquerading as muffins in bakeries and shops! You can tell the difference between them from the texture. Muffin is a type of quick bread, with a texture somewhat of a cross between a cake and bread. The way I would describe it would be light, fluffy, and full of flavour, and a wonderful aroma. A muffin would be suitable for a light breakfast or afternoon tea and accompanied by a pick-me-up skinny Flat White.
I was on a muffin making spree recently having picked up the correct technique of making muffins. (They are now light and fluffy, vs. heavy and dense…yay!). I made orange muffins, banana muffins, banana and strawberry muffins and banana and white chocolate chip muffins. Here is the recipe for the banana and strawberry muffin. I believe in the goodness of home-made foods and hope you enjoy the process of making it, and the result of your muffin. Take heart, even if it turns out dense at your first try, the taste of the muffin will still be delicious! Don’t give up; you can always drop me a note if you need help.
Strawberry Banana Muffin (Adapted from Joy of Baking)
Makes 12 regular muffins
Ingredients
113g unsalted butter, melted
160g light brown sugar
2 large eggs, lightly beaten
1 teaspoon (4 grams) pure vanilla extract
2 large ripe bananas, mashed (about 1 cup)
240 ml fresh or frozen strawberries (cut into small pieces)
315g plain flour
1.5tsp baking powder
1/4 teaspoon baking soda
1tsp (4 grams) ground cinnamon powder
1/2 teaspoon (2.5 grams) salt
Method
Preheat oven to 175°C.
In a small saucepan melt the butter. Set aside to cool.
Whisk manually together the brown sugar, eggs, vanilla extract and mashed banana. Add the melted butter to the brown sugar mixture and stir to combine.
In another bowl combine the flour, baking powder, baking soda, cinnamon, and salt. Gently fold in the chopped strawberries, making sure they are coated with flour. This helps to prevent the berries from sinking during baking. Do not over mix.
Add the wet ingredients to the dry ingredients and stir only until the ingredients are just combined. Do not over mix the batter or tough muffins will result.
Fill each muffin cup about two thirds full of batter.
Bake at 175°C for 20 to 25 minutes.
Transfer to a wire rack to cool.
Enjoy!
Tuesday, March 3, 2009
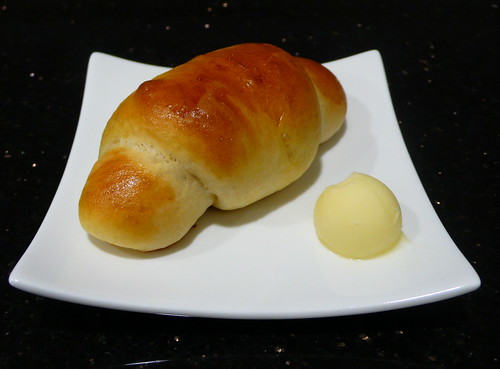
Sandwich Bread (Water Roux Method)

Statement: The smell of freshly baked bread is homely and utterly delicious. (True)
This thought was extrapolated when I was standing in a bakery and enjoying the different whiffs of various breads, both sweet and savoury. This led me down the slippery path of purchasing an additional kitchen appliance....a Bread Machine. I stress the word "additional" because I already have a lovely kitchenaid which comes with a dough hook, and can knead bread. But I reasoned to myself, on a day when I want to make both cake and bread, I don't have to overwork my lovely KitchenAid. In addition, the Bread Machine has another unique feature. I can program it using the overnight function and wake up to freshly made bread. Both scenarios never happened!!!
I never baked cakes nor made bread at the same time. And the bread recipes I use mostly require cream / milk and I cannot imagine them sitting though the night at room temperature.
Nevertheless, I have been good, and making good use of this new appliance. I have churned out some pretty decent loaves. Through trial and error, I've learnt that a bread machine, while able to bake bread, cannot come up with bread of the same quality as the ones which are baked in an oven. Now I use my bread machine for kneading and raising the dough but bake it later in my trusted oven.
Here is a successful bread recipe for Sandwich Bread, using the widely popular Water Roux method. Water Roux is made by using a proportion of 1:5, 1 part Bread Flour, and 5 parts water. Constantly stirred over a low flame till it reaches a paste like consistency. This method allows the bread flour to absorb more water, and when added to the recipe, produces a better hydrated loaf of bread. The temperature which the mixture reaches this paste-like texture is 65°C.
Recipe adapted from Florence's Blog.
Water Roux
Ingredients
50g Bread Flour
250g Water
Method
Mix the Bread Flour and Water together in a saucepan, and simmer over medium heat. Once it changes from a mixture to a paste-like texture, and streaks can be seem at the top. Remove from heat and cool.
Transfer into a bowl.
Place a piece of glad wrap touching the surface of the Water Roux so that a "skin" will not form.
Sandwich Loaf Recipe (Using a Bread Machine)
Ingredients
250g Bread Flour
1 Tbsp Milk Powder
80g Water Roux
105ml Warm Water
4g Salt
25g Sugar
5g Yeast
25g butter
1 Egg
Method
1. Place all ingredients (except Butter) into the bread machine and start the dough cycle. (Sequence should be wet ingredients, followed by dry, and topped off with Yeast. The yeast cannot be in direct contact with salt. If it does, it might kill the yeast.)
2. After 10-15mins, or when the ingredients have come together to form a ball, stop the dough cycle, add the butter and start the dough cycle again.
3. Once the dough cycle is completed which is 75 minutes, remove dough and press out the air from it. Rest the dough for 15 minutes.
4. Shape into a flat rectangular shape and roll it like a swiss-roll.
5. Place dough pieces into loaf pan / pullman tin and let it prove till about 90% full. Place in a enclosed space, i.e. a microwave oven which is not switched on, this is to prevent the bread from drying.
6. Cover the loaf pan with its lid and bake at 175°C for about 25 - 30 minutes. (Internal Temperature should be about 88-98°C.)
Enjoy the freshly baked home-made bread!
Monday, February 23, 2009
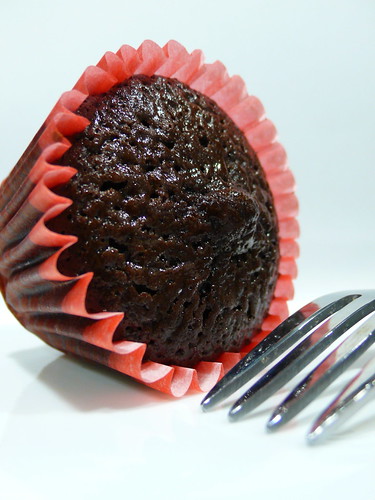
Devil's Food Cupcakes
I love chocolate! And I can't imagine anyone who doesn't. The aroma, the deep brown color, the lingering taste all adds up to a pretty pleasurable experience visually and on the palate.
There are so many different techniques in recipes to bring out the best chocolate flavor in a chocolate cake. This recipe uses a unique method adding hot water directly to the cocoa powder, and whisking it fast so that it develops into an aromatic chocolate flavored liquid. This technique releases all the chocolate flavors in the powder, and gives an full-bodied chocolate intensity in the cupcakes.
Its simple to make and very delicious. Not to sweet nor too bitter, adults and children will both like it!
Recipe adapted from Cindy Mushet's The Art and Science of Baking, Sur La Table
Makes 28 Cupcakes
70g Dutch-process cocoa powder
115g plus 230g Water
170g Unsalted butter, softened
200g Castor sugar
170g Light brown sugar
3 eggs (60g each, weighed with shells), room temperature
2 Tsp Vanilla extract
200g Cake flour, sifted
35g All-purpose flour
2 Tsp Baking powder
¼ Tsp Salt
Preheat the oven to 175°C.
Place the cocoa powder in a small bowl. Heat 115g of the water. Pour it over the cocoa powder and whisk until blended and smooth. Add the remaining 230g water and stir until the mixture is smooth. Mixture must be cool before adding to the cake mixture, as the heat will melt the butter and ruin the texture of the cake.
Cream the butter with the sugars: Beat on medium-high speed until very light in color, 4 to 5 minutes.
Scrape down the bowl with the spatula.
Add the eggs. (Beat the eggs and vanilla in the other small bowl to blend.) With the mixer on medium, add the eggs to the butter mixture about 1 tablespoon at a time, allowing each addition to completely blend in before adding the next. About halfway through, turn off the mixer and scrape down the bowl, then resume adding the eggs. Scrape down the bowl again.
Add the dry and wet ingredients alternately: With the fine-mesh strainer, sift the cake flour, all-purpose flour, baking powder, and salt into the medium bowl and blend with the cleaned whisk. With the mixer on the lowest speed, add the flour mixture and the cocoa water alternately, beginning with one-third of the flour mixture and half the cocoa water. Repeat, then finish with flour mixture. Scrape down the bowl and finish blending the batter by hand, if necessary.
Bake the cupcakes: Divide the batter evenly among 28 of the paper liners. Fill each liner 3/4 full with batter. Bake for 15 to 20 minutes, until the tops are firm to the touch and a toothpick inserted into the centers comes out clean. Transfer to a rack to cool completely.
Verdict: This cake is moist, soft, extremely chocolately and yet amazing light on the palate. Its chocolatety and not too sweet. A keeper!
Tools: Whisk, Cupcake Liners, Muffin Tray, Stand Mixer, Silicon Spatula
Tips: Do not use waxed cupcake liners. The cake will shrink away from the casing, and look small and lonely.
Saturday, February 14, 2009
Sugee Cookies

Chinese New Year was an extremely busy time for me, mostly with family events. I have to admit, I am not much of a CNY person. I much prefer Christmas. So it takes some effort to muster up the enthuaism for this festival. I baked two types of cookies, packed them into pretty glass bottles, ribboned them and gave them as gifts to family.
Here's the recipe that I used for the Sugee Cookies:
Sugee Cookie
(Adapted from Aunty Yochana)
Ingredients:
150g Clarified Butter (also known as Ghee. I used the QBB brand)
90g Icing sugar
1 Egg yolk
1/4 tsp Salt
1/2 tsp Vanilla essence
200 g Plain flour
40 g Ground almond Meal
1 tsp Baking Powder
1 egg yolk for Glazing
Method:
(1) Use a stand mixer. Cream ghee and icing sugar till creamy. Add in egg yok, vanilla, salt and mix thoroughly.
(2) Add in sifted plain flour, baking powder and ground almonds. Mix till a dough is formed.
(3) Roll into small round balls for about 5-6g each. and arrange on baking tray.
(4) Use a chopstick to dip into egg yolk and then press it on top of each roll ball.
(5) Bake at 165C for about 15 - 20 mins or till cooked.
(6) Cool on wire rack before storing in cookie containers.
Verdict: Texture is melt in your mouth and extremely fragrant.
You need: Cake Mixer, Seive, Baking tray, Parchment Paper, Chopsick, Cookie Shovel, Cooling Rack
Monday, January 5, 2009
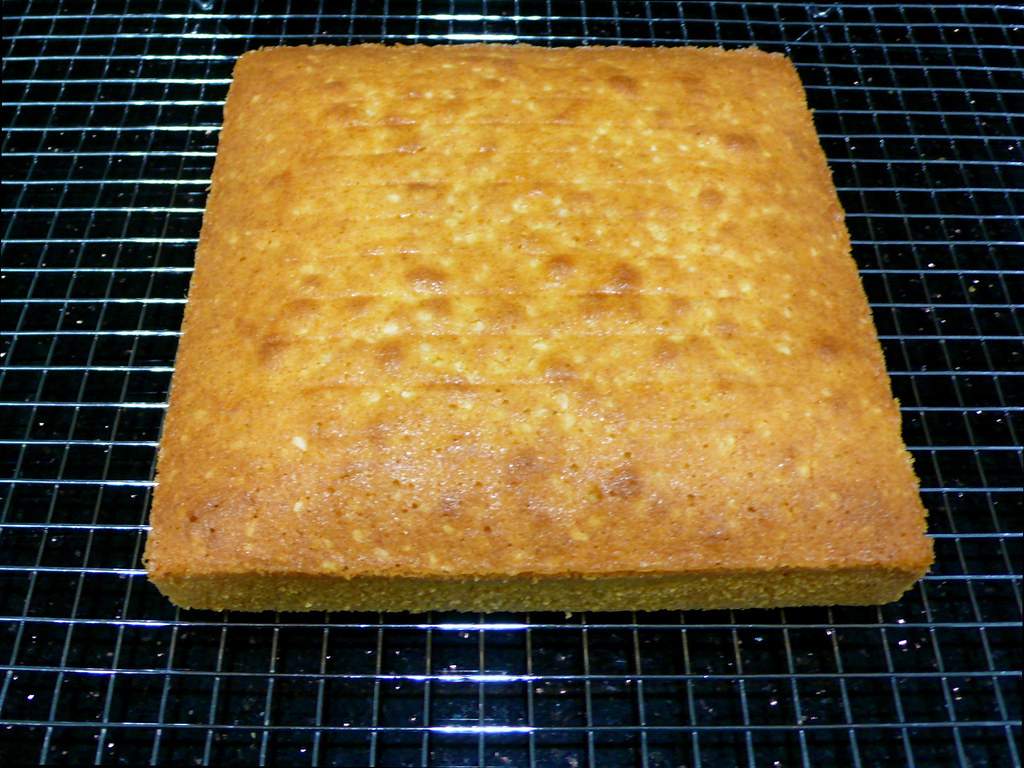
Sugee Cake
Sugee cake is a very rich, buttery, almondy cake with a grainy texture. Its sort of a traditional Eurasian celebration cake, and often makes its appearance at events such as weddings and christmas. Semolina, which is granulated wheat flour is the special ingredient in the cake is what makes the cake texture so special.
I made this cake using my husband's family sugee cake recipe. When the cake was baking, the aroma of the cake filled my kitchen and diffused into my hall and I couldn't wait for it to be ready. After it was done, the cake was warm and tasted slightly dry, however, after sitting for a day to let the flavors blend and merge, the cake was perfect!
I made this cake using my husband's family sugee cake recipe. When the cake was baking, the aroma of the cake filled my kitchen and diffused into my hall and I couldn't wait for it to be ready. After it was done, the cake was warm and tasted slightly dry, however, after sitting for a day to let the flavors blend and merge, the cake was perfect!
Saturday, January 3, 2009
Pasta with Braised Duck Sauce
I have seen this recipe on Chubby Hubby's blog and have been wanting to try it. I'm very selective of the type of meats that I eat, and I'm not a fan of duck, having tried versions which were for very "ducky" for the lack of a better word. But I read positive reviews of this from reputable blogs, and I could picture in my mind, how the flavours of the celery, onions, carrots and tender duck meat would blend together. I decided that this one will make it to my "Recipes to try list". I hunted for duck legs, and found them at the frozen food section in Carrefour at Suntec city. Bought a 1 kg bag and scaled down the recipe by a third for dinner for two.
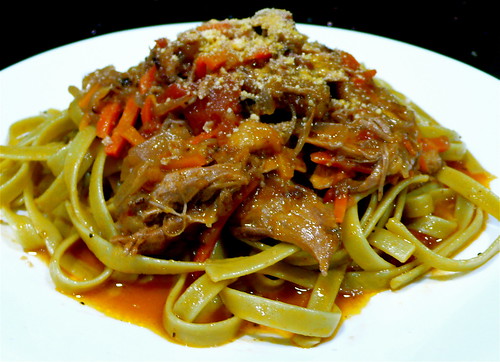
Verdict: The duck was extremely tender and flavourful after being stewed for two hours. The tangy tomato taste was subtle and well balanced with the basey duck meat. The sauce rested on a bed of spinach fettucine, cooked till al dente of course. This would be a dish I would serve up if I entertain, as it taste great and looks very presentable. Finish up the meal with a nice chilled sparkling Muscato. La Dolce Vita!
Recipe adapted from Chubby Hubby's Blog
BRASATO D`ANATRA
Chef Roberto Galetti’s Braised Duck Sauce
180 gr celery, julienne
180gr carrots, julienne
180 gr onion, julienne
1 kg duck legs
400 g of stewed whole tomatoes (SW brand, I used the whole can)
250g red wine
500 ml chicken stock
2 bay leaves
Pinch of Salt
4 Dashes of Black Pepper
Salted lurpak butter
Parmesan Cheese
Italian Parsley
In a big pot, sauté the vegetables with olive oil.
Meanwhile flour (with corn starch) the duck legs and then pan-fry them until golden. (The excess corn flour also helps to thicken the sauce later)
Put the duck legs into the pot together with the vegetables.
Then add the wine, the bay leaves, and the tomato. Crush the tomatoes into the pot with your hands. Pour in the vegetable stock and bring everything to a boil. As soon as it boils, lower the heat, cover and simmer for 2 hours.
After 2 hours, separate the meat from the sauce. Remove excess fat and skin. Then debone the duck legs, mixing the meat back into the vegetables and sauce. Leave some meat in chunks. Leave to rest.
Cook the pasta till al dente. Then reheat a portion of the sauce in a pan with butter, black pepper, and salt. Add some of the boiled/cooked noodles and toss. Sprinkle Parmesan cheese and Italian Parsley over the pasta and serve immediately.
Friday, January 2, 2009

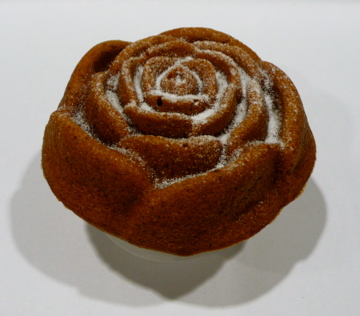
Cordon Rose Banana Cake
I guess anything that indulges our senses, smell, sight, taste can bring us back to a a memory, be it a happy or sad one. I have always liked banana cake. I think it has something to do with the smell. The sweet scent that reminds me of family, comfort and it does tug at your heartstrings.
Having read very good reviews on this banana cake from Rose Levy Beranbaum's "The Cake Bible", I decided to purchase the book and this recipe was the first one that I would try. I had some bananas which were grown organically in my mother's garden, and gave it a go.
I used the Nordic Ware Bouquet Pan, which gives me two roses, two daises and two sunflowers. The little cakes rose in the oven and erupted in the center! I had to adjust the baking time as the time in the recipe was for a normal sized cake. After they were cooked, I flipped the pan over and placed it on a wire rack for about 3 minutes, placing some pressure on the pan so the erupted dome would retreat and I would get a somewhat flat bottom. It worked and here's a photo of my rose.
Cordon Rose Banana Cake (adapted from Rose Levy Beranbaum's The Cake Bible)
Ingredients
2 large ripe bananas, at room temperature
120g sour cream
2 large eggs (about 60g with shell), at room temperature
1 1/2 tsp vanilla extract
200g sifted cake flour
170g caster sugar
1 tsp baking soda
3/4 tsp baking powder
1/2 tsp salt
142g unsalted butter, softened
Icing Sugar for Dusting
Method
Preheat oven to 175C.
Using a food processor, process bananas and sour cream till well combined. Add eggs, lemon zest and vanilla in. Process till smooth and set aside.
Combine the flour, baking powder, soda, salt and sugar using an electric mixer for about half a minute. Add butter and half of banana mixture in, beating batter on low speed till just combined. Increase speed to medium and beat for about a minute and a half. Add remaining banana mixture in 2 batches, beating for 20 seconds on low speed after each addition.
Pour batter into prepared Nordicware Pan, filling each mould till about three quarters full. Bake for about 22- 25 minutes or till skewer inserted into the middle comes out clean. Remove from oven and then from pan and let cakes cool completely on a wire rack. Sprinkle Icing Sugar before serving.
Subscribe to:
Posts (Atom)